Inserting Images, Snippets, and Assets
Images
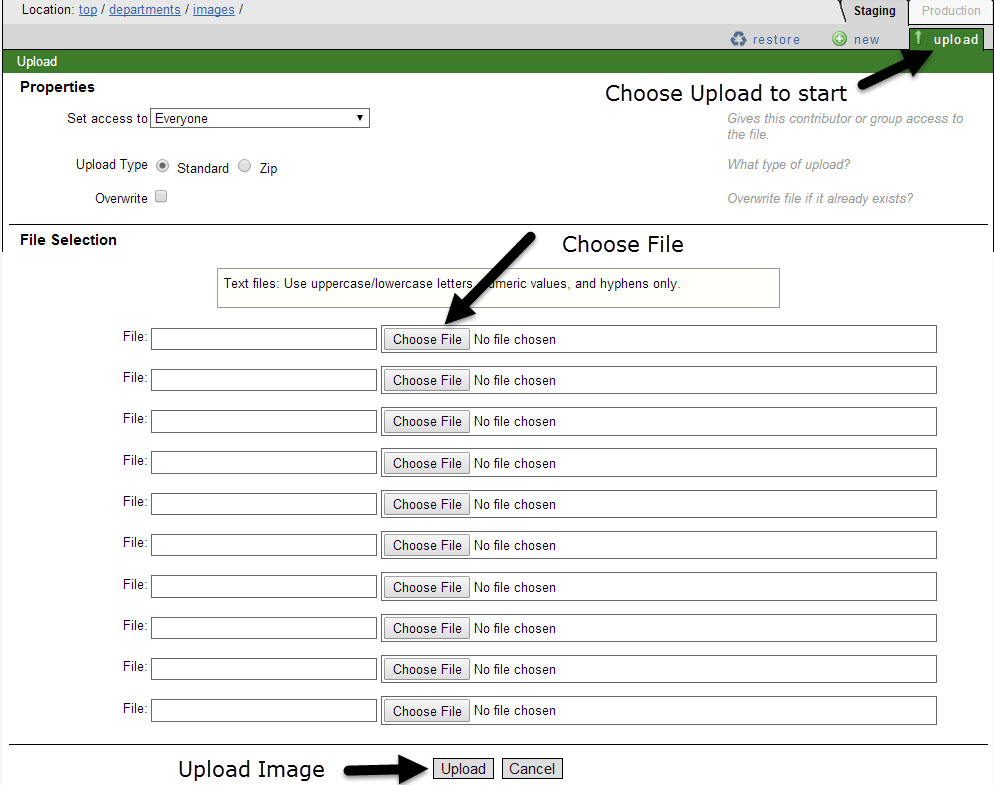
Before you can insert an image on your page, you will need to upload the image into you images folder within your department's directory. Go to your images folder, click upload, and choose file.
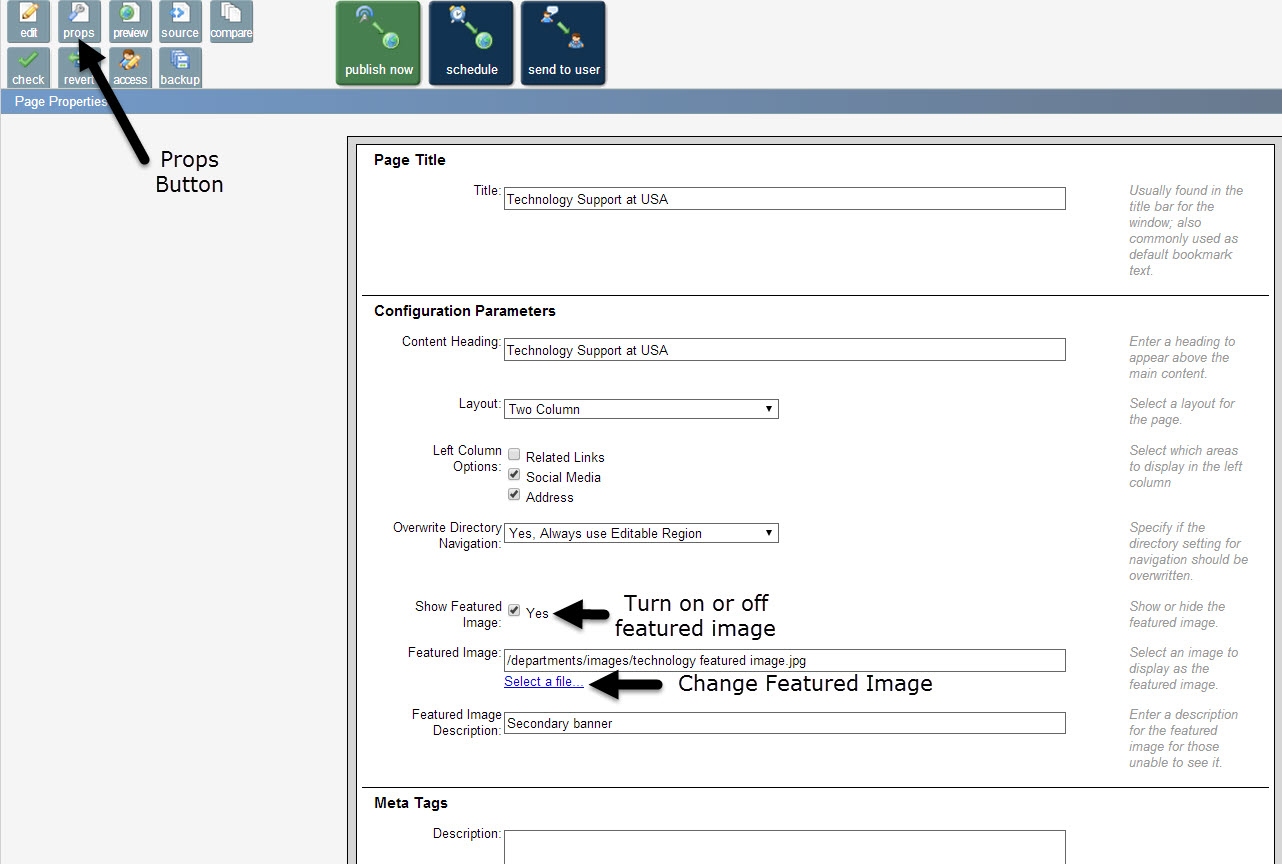
If you choose to have a featured image on your page, you can change the featured image within the Properties (Props) Button when the page is checked out. You can browse out and select the file. The common size for featured images is 850x360 if you are using it for a page with a two-column layout and 560x300 for three-column layout. In order for images to display quickly, save them at 72dpi.
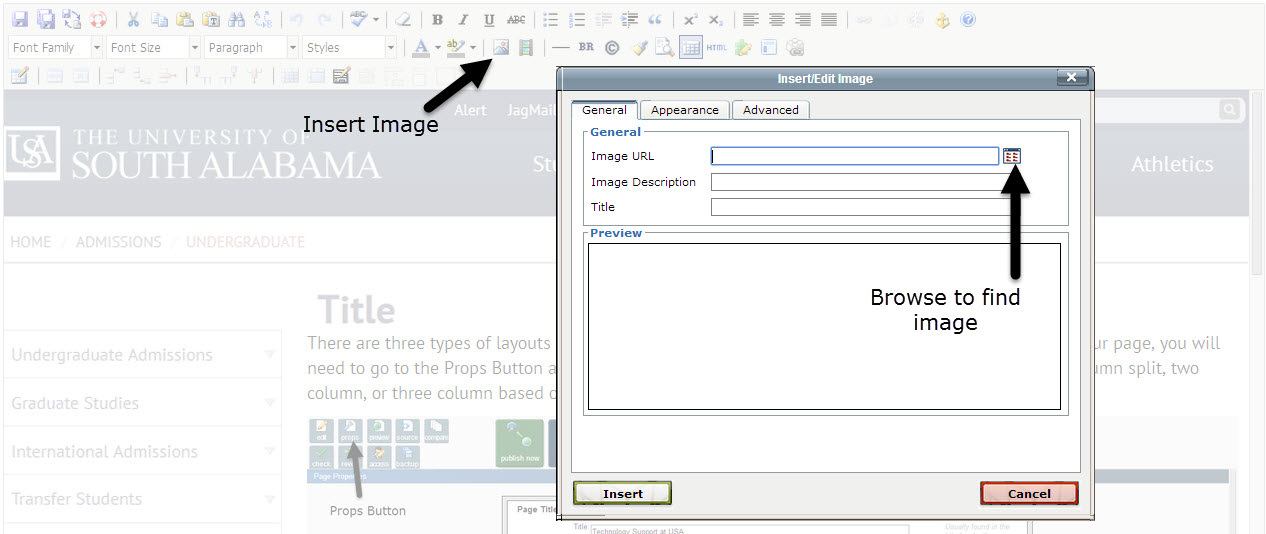
You can insert an image in an editable region on your page through the WYSIWYG. Click the Insert/Edit Image icon and browse out and select your image. Be sure the dependency tag for the image is added to Image URL rather than the image path.
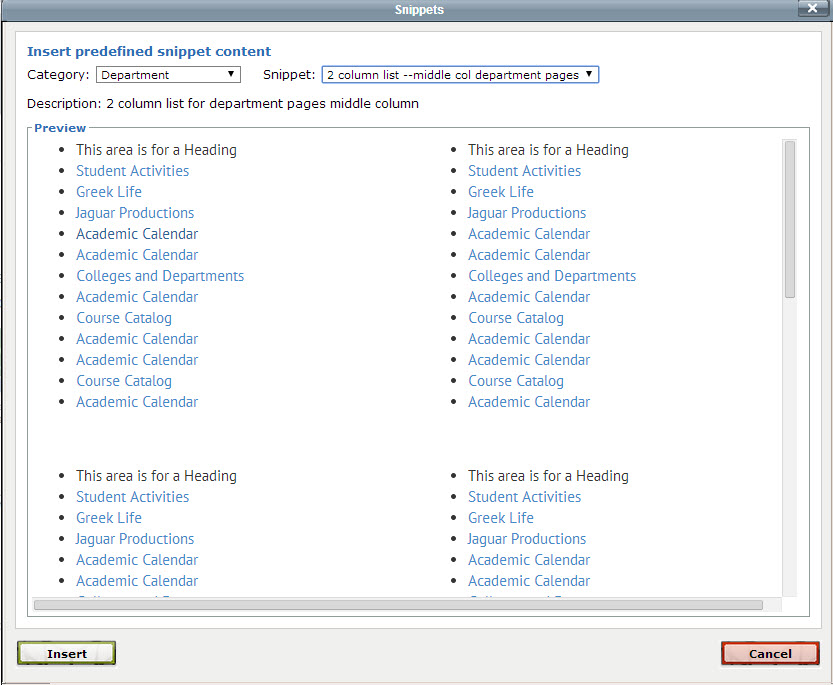
Snippets and Assets
Assets and snippets that have been created to use on your pages by inserting them through the WYSIWYG.

Asset
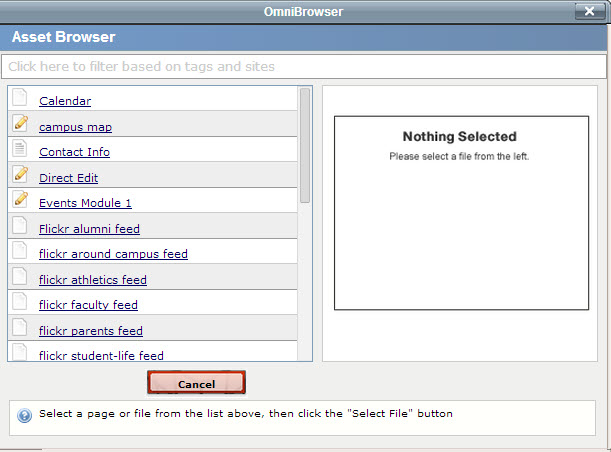
An asset can be inserted onto a number of pages. When an asset is edited, it will change on every page where it resides. Please see Programs (Assets) under the Webmaster Resources for examples. If you see an asset you would like to use on your site, please contact Web Services for it to be created.
Snippet
A snippet can also be inserted onto a number of pages, but it can be edited directly from your page. A snippet changed on one page does not affect the snippet when used on another page. Snippets are divided into categories according to the page type you are editing. Please see Templates (Snippets) under the Webmaster Resources for examples.
